Ubuntu 22.04, NVidia and Intel hybrid graphics with multiple display problem and how to make it work

For WCE work, I used to use a Dell Latitude E7340 donated to WCE. It was not fast machine but it is easy to swap disks, etc. I got a lot of mileage out of it. With WCE getting newer laptops, I decided to replace it with newer one. It is not really new as it is a used donated Lenovo P51 but it is still better. Quad core, NVMe x 2, and 2.5 disk space
I fresh installed a vanilla Ubuntu 22.04 on it. What do you know, the external monitor does not work. This is a deal breaker as most of work I do with it, I work with an 2nd monitor.
So, here is what I have found:
1. Do not connect the external display until all of steps complete
2. In the BIOS, enable “hybrid graphics”. Choosing “discrete graphics” hangs at start up.
3. You must install NVidia proprietary driver
4. Once Ubuntu is up and the laptop is useable, open NVIDIA Settings
5. In it, go to “PRIME Profiles”, and choose NVIDIA (Performance Mode)
6. Reboot the machine
7. Profit!
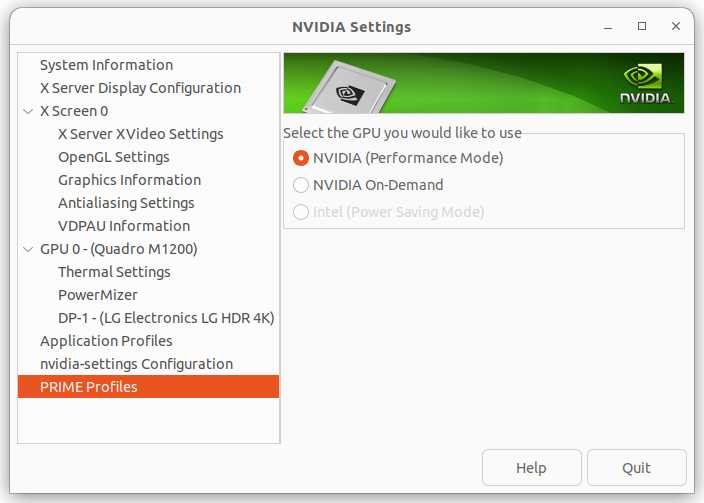
NVidia native driver settings
It looks like this it not limited to Ubuntu or 22.04. Hybrid graphics and the driver is buggy. When an external monitor is connected, it kills Xorg and hangs the machine. Since this means that the graphics chip consumes more energy, it would be not ideal for laptop use but at home and using this as workstation, this setting gets around the bug. I am writing this on very this laptop with an external monitor.

setxkbmap -layout us,us -option “” -option “caps:backspace,ctrl:swap_lalt_lctl_lwin”

With two -option options, the first “” clears off the existing options, and the 2nd one “adds” to the empty options. This sets the capslock as the backspace, left-alt as the control key, “windows” key as meta, and left control as super key. My left hand is very happy.

Intel 4000 HD Graphics with 2560×1440 on HDMI

First, see what’s your monitor connection.

$ xrandr --listmonitors
Monitors: 1
0: +HDMI-2 1920/697x1080/392+0+0  HDMI-2
$ xrandr --newmode "2560x1440" 220.812 2560 2608 2640 2720 1440 1443 1448 1478 -hsync -vsync
$ xrandr --addmode HDMI-2 "2560x1440"

After this you may have to bring up the “Display” control panel and choose newly added 2560×1440 resolution. This will be 55 Hz with reduced blanking

MacOS X Xquarz and xmodmap

I finally bit a bullet and set up the keymap for Mac. Here is my current ~/.Xmodmap file content.

! left-alt 66
! right-alt 69
! left-command 63
! right-command 71
! right-menu 118

clear Mod1
keycode 118=Alt_L
add Mod1 = Alt_L

clear Mod2
keycode 66=Meta_L
keycode 69=Meta_R
add Mod2 = Meta_L Meta_R

clear Mod4
keycode 63=Super_L
keycode 71=Super_R
add Mod4 = Super_L Super_R

The key to figuring out the keycode is to use a command xev and it prints out all of events to stdout. Run it in xterm, press keys, and you can see what X wants.

I thought that Mod1 is the Meta, but somehow it didn’t work. I used Mod2 for Meta. Mod4 is Super.

My fingers are extremely happy to use Emacs under Xquartz at last.